How to approach an unknown instrument to repair or restore.
Ok so picture this: you arrive early in the morning to a customer’s; too early for everyone. The customer arrives a few minutes late too. I think that us who dwell in the music sphere of influence tend to be underproductive in the mornings… I’m sure I’m wrong, though. Anyway, I go in to the recording studio and I see the Electra-piano staring at me for the first time.
The first thing that I do is to get acquainted with the system. That means the WHOLE system. You can’t work well if you don’t understand the whole instrument. Sometimes, whatever you do on one part of the instrument has a big influence somewhere else unexpected. Think of the butterfly effect, but restrict its effect to the realm of the instrument!
So rewind the action. It all begins before going to the customer’s, or going to your Fender Rhodes, Clavinet or Würlitzer that you sniped in an online auction. Step number one is research. Search online for the instrument. I wounded up finding the instruction manual from clavinet.com. I read it front to back, underlined the important information and did my best to understand the schematic.
So we are back in the room with the Hohner Electra. I switch it on. Straight away I notice an abnormal amount of hum. Specifically it is 100Hz hum. I really recommend using an app for these cases if you have any trouble determining what frequency the hum is. Best app I found is hands down Spectroid (Freeware). I won’t get into detail in this post, but 100Hz hum means that the hum is entering the amplification stage after rectification (the conversion of AC to DC). I told the client that it would be best to change all capacitors in the instrument. Not only because this will reduce the amount of hum considerably, but also because it is good practice. Why invest hundreds of Euros or Dollars in an instrument restoration by tuning the Hohner, readjusting the action, setting the keys and/or doing repairs of any kind if then a capacitor decides to short itself and blows the transformer up. Now that is how repairs get expensive! Trying to source the right parts can be very expensive. That is why I always recommend to change the caps on any electric instrument as old as this Piano Electra. The customer is delighted to reduce the amount of hum and to have an instrument that will perform like new, and at the same time guarantee another 20-30 years of reliable capacitors.
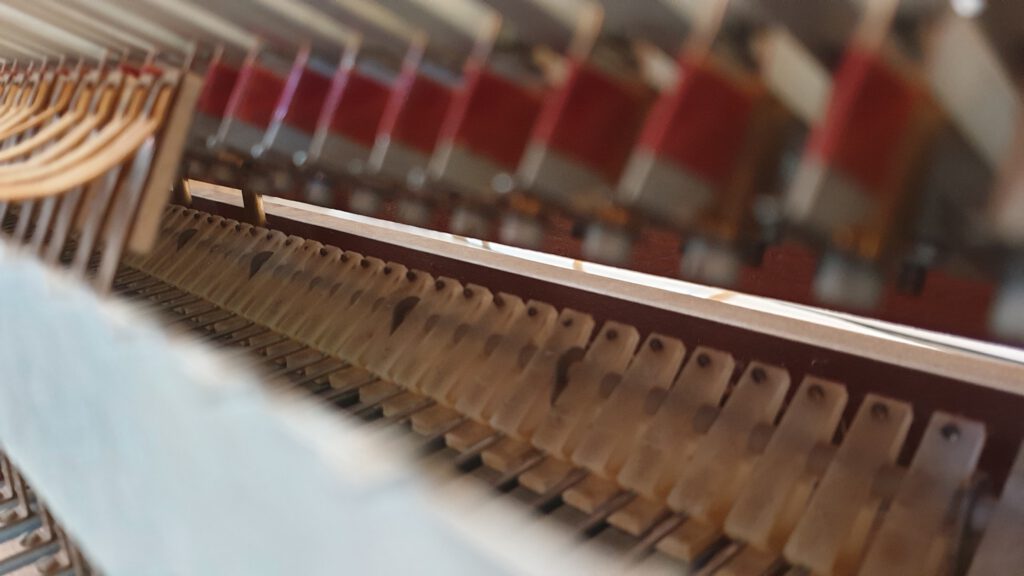
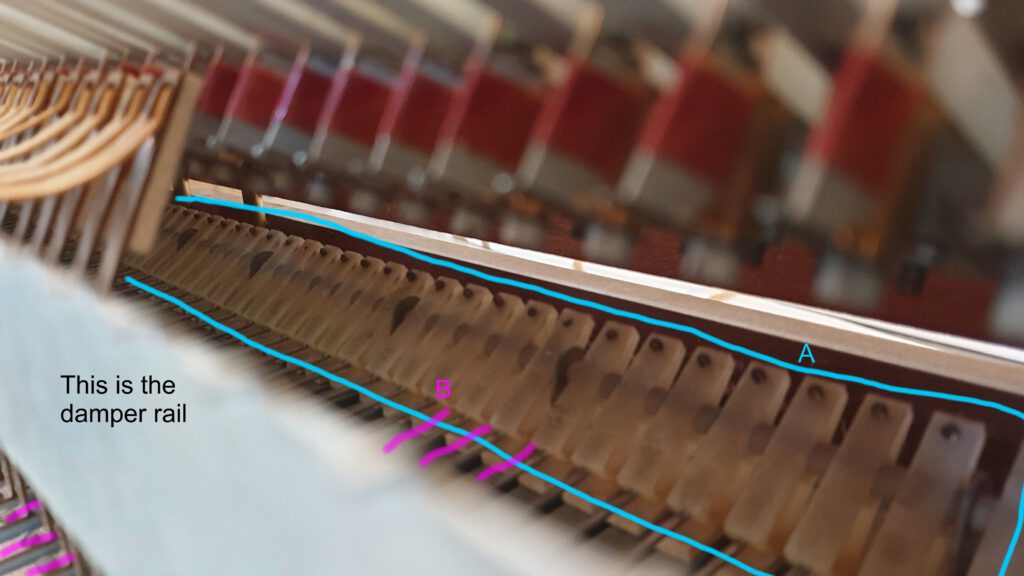
It is not time for recapping yet, though. I open the lid and cover of the instrument and see all the tongues with their asymmetric tuning-fork construction, lined up. I see the damping system. Now I direct your attention to the hammers and how they are connected to the keys. “That is called a Prellmechanik… well it is sort of a Prellmechanik” – I say. I’ve been in Germany for long enough to not know the names of such concepts in English.
Look at pic 1. You can identify a few elements that seem to repeat for every key and are, therefore, clones (or similars) of themselves which repeat from left to right.
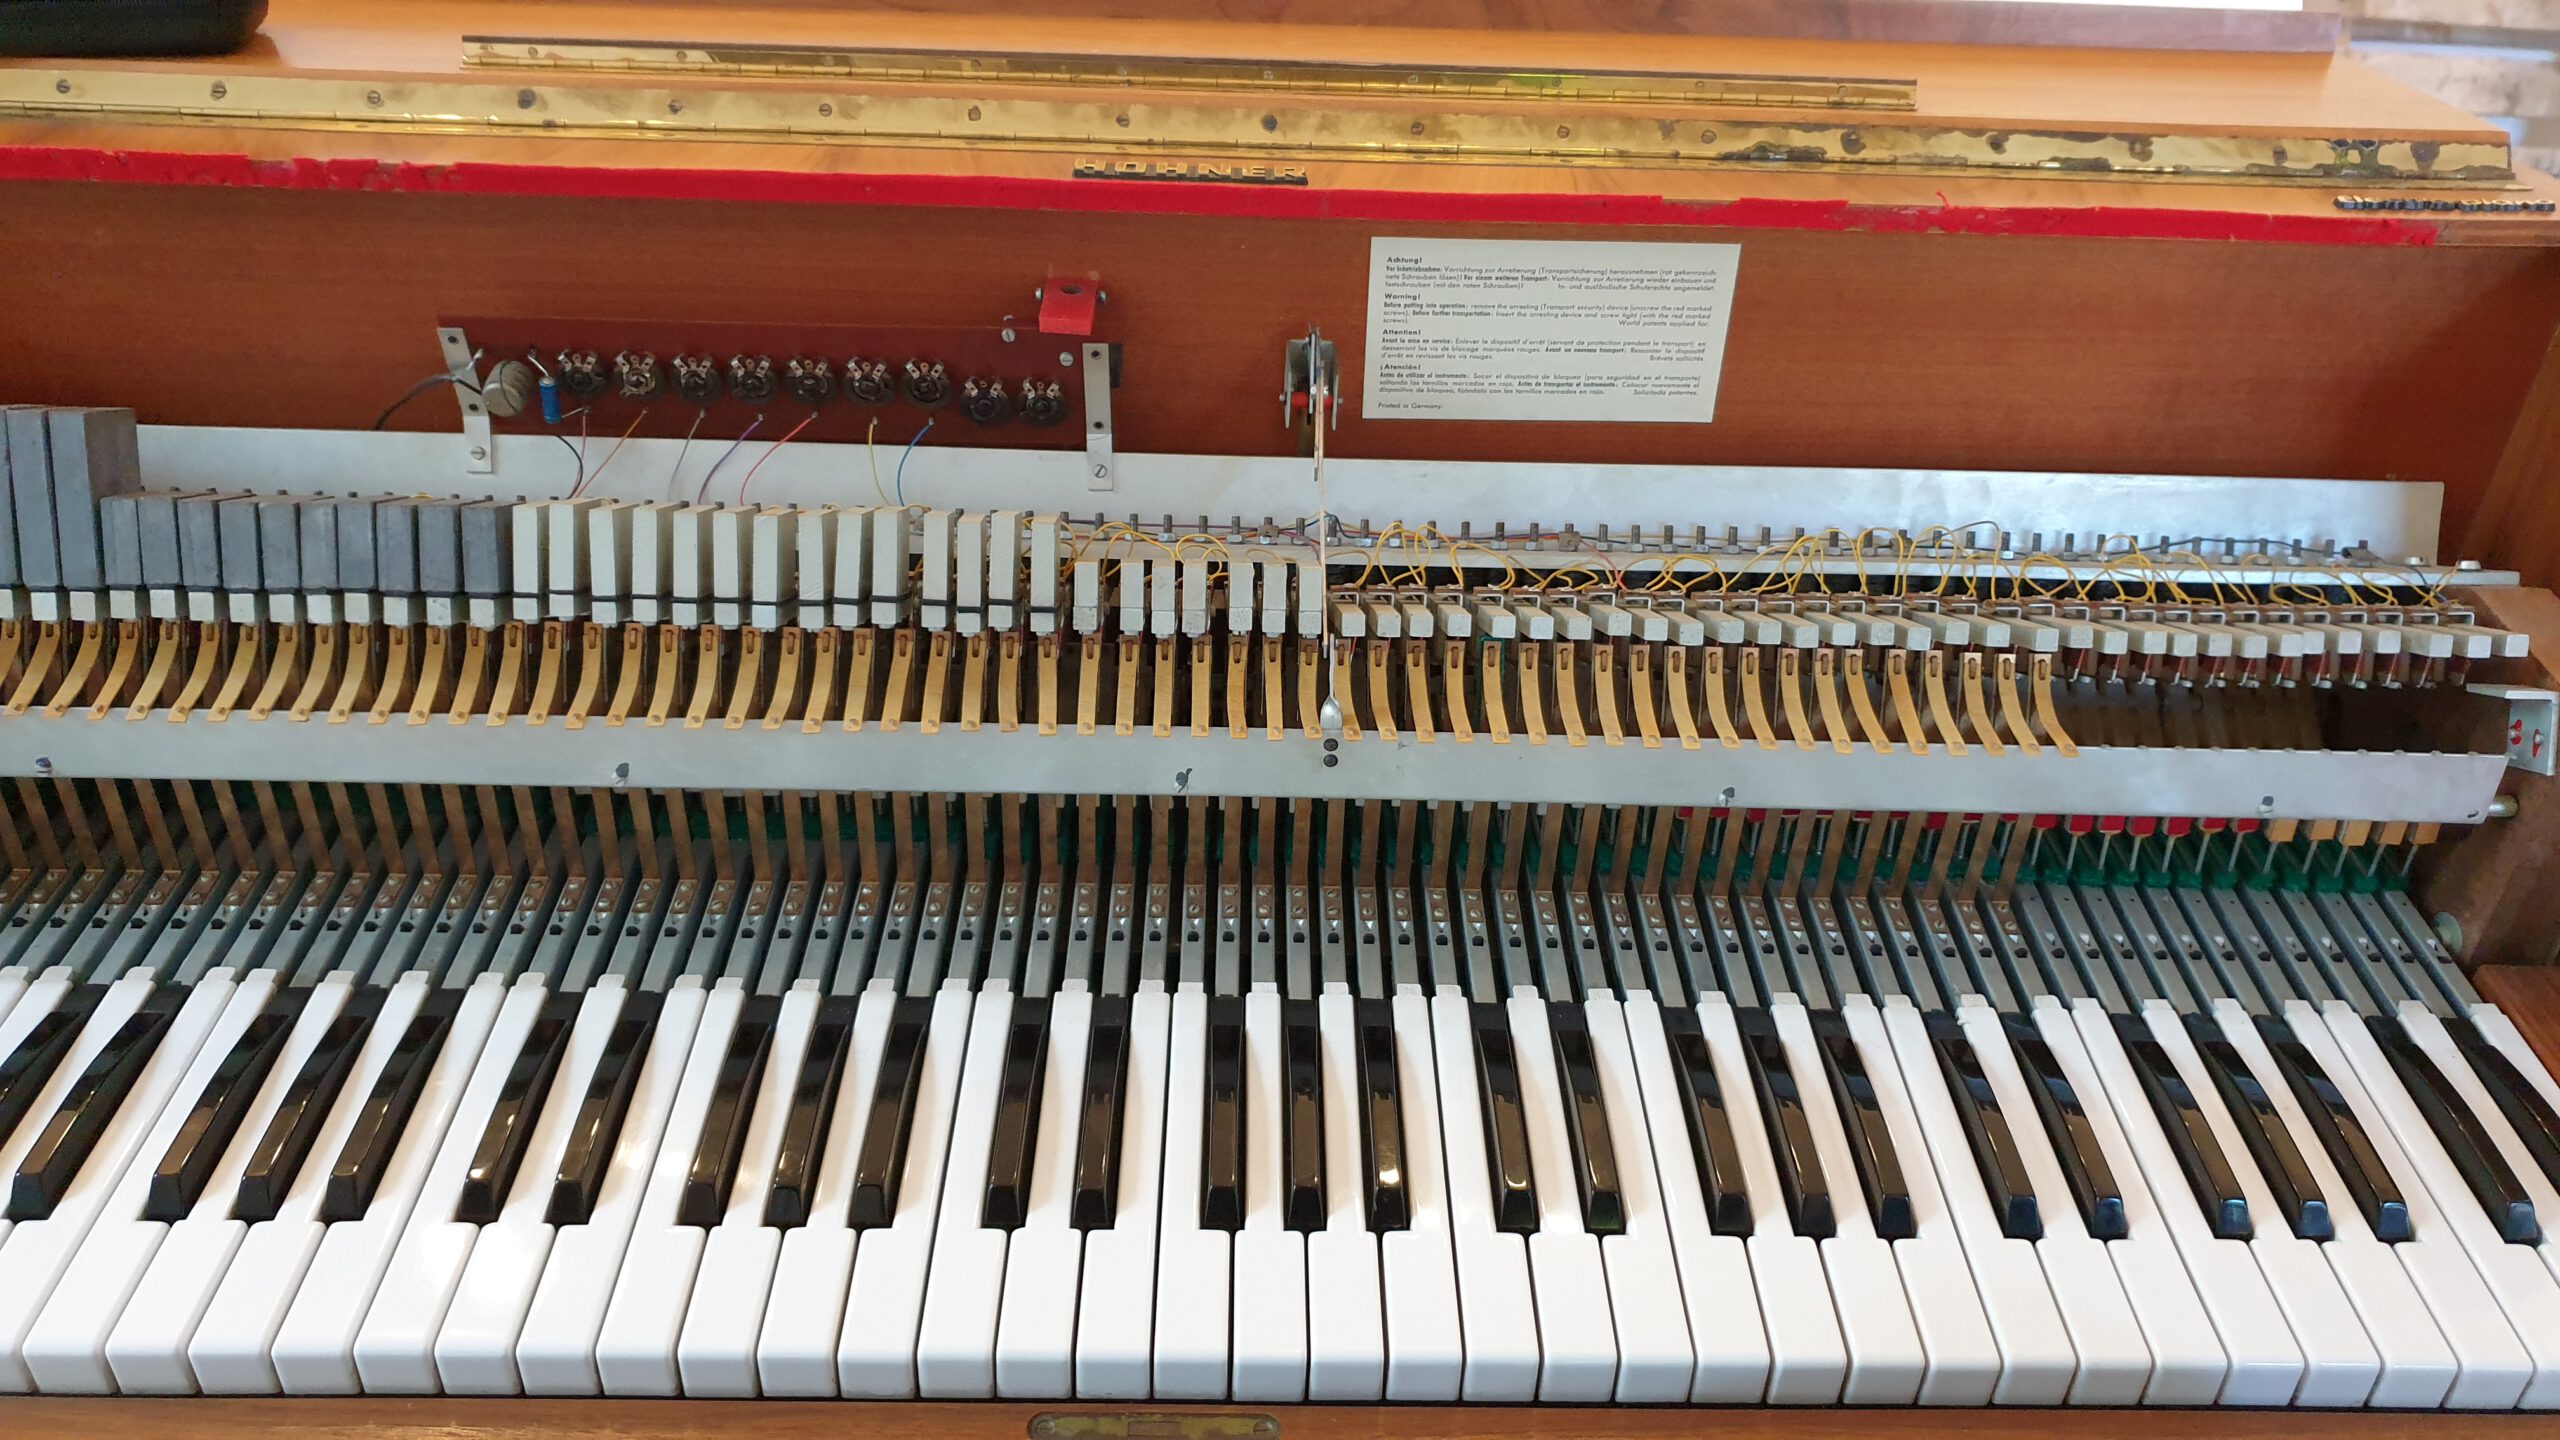
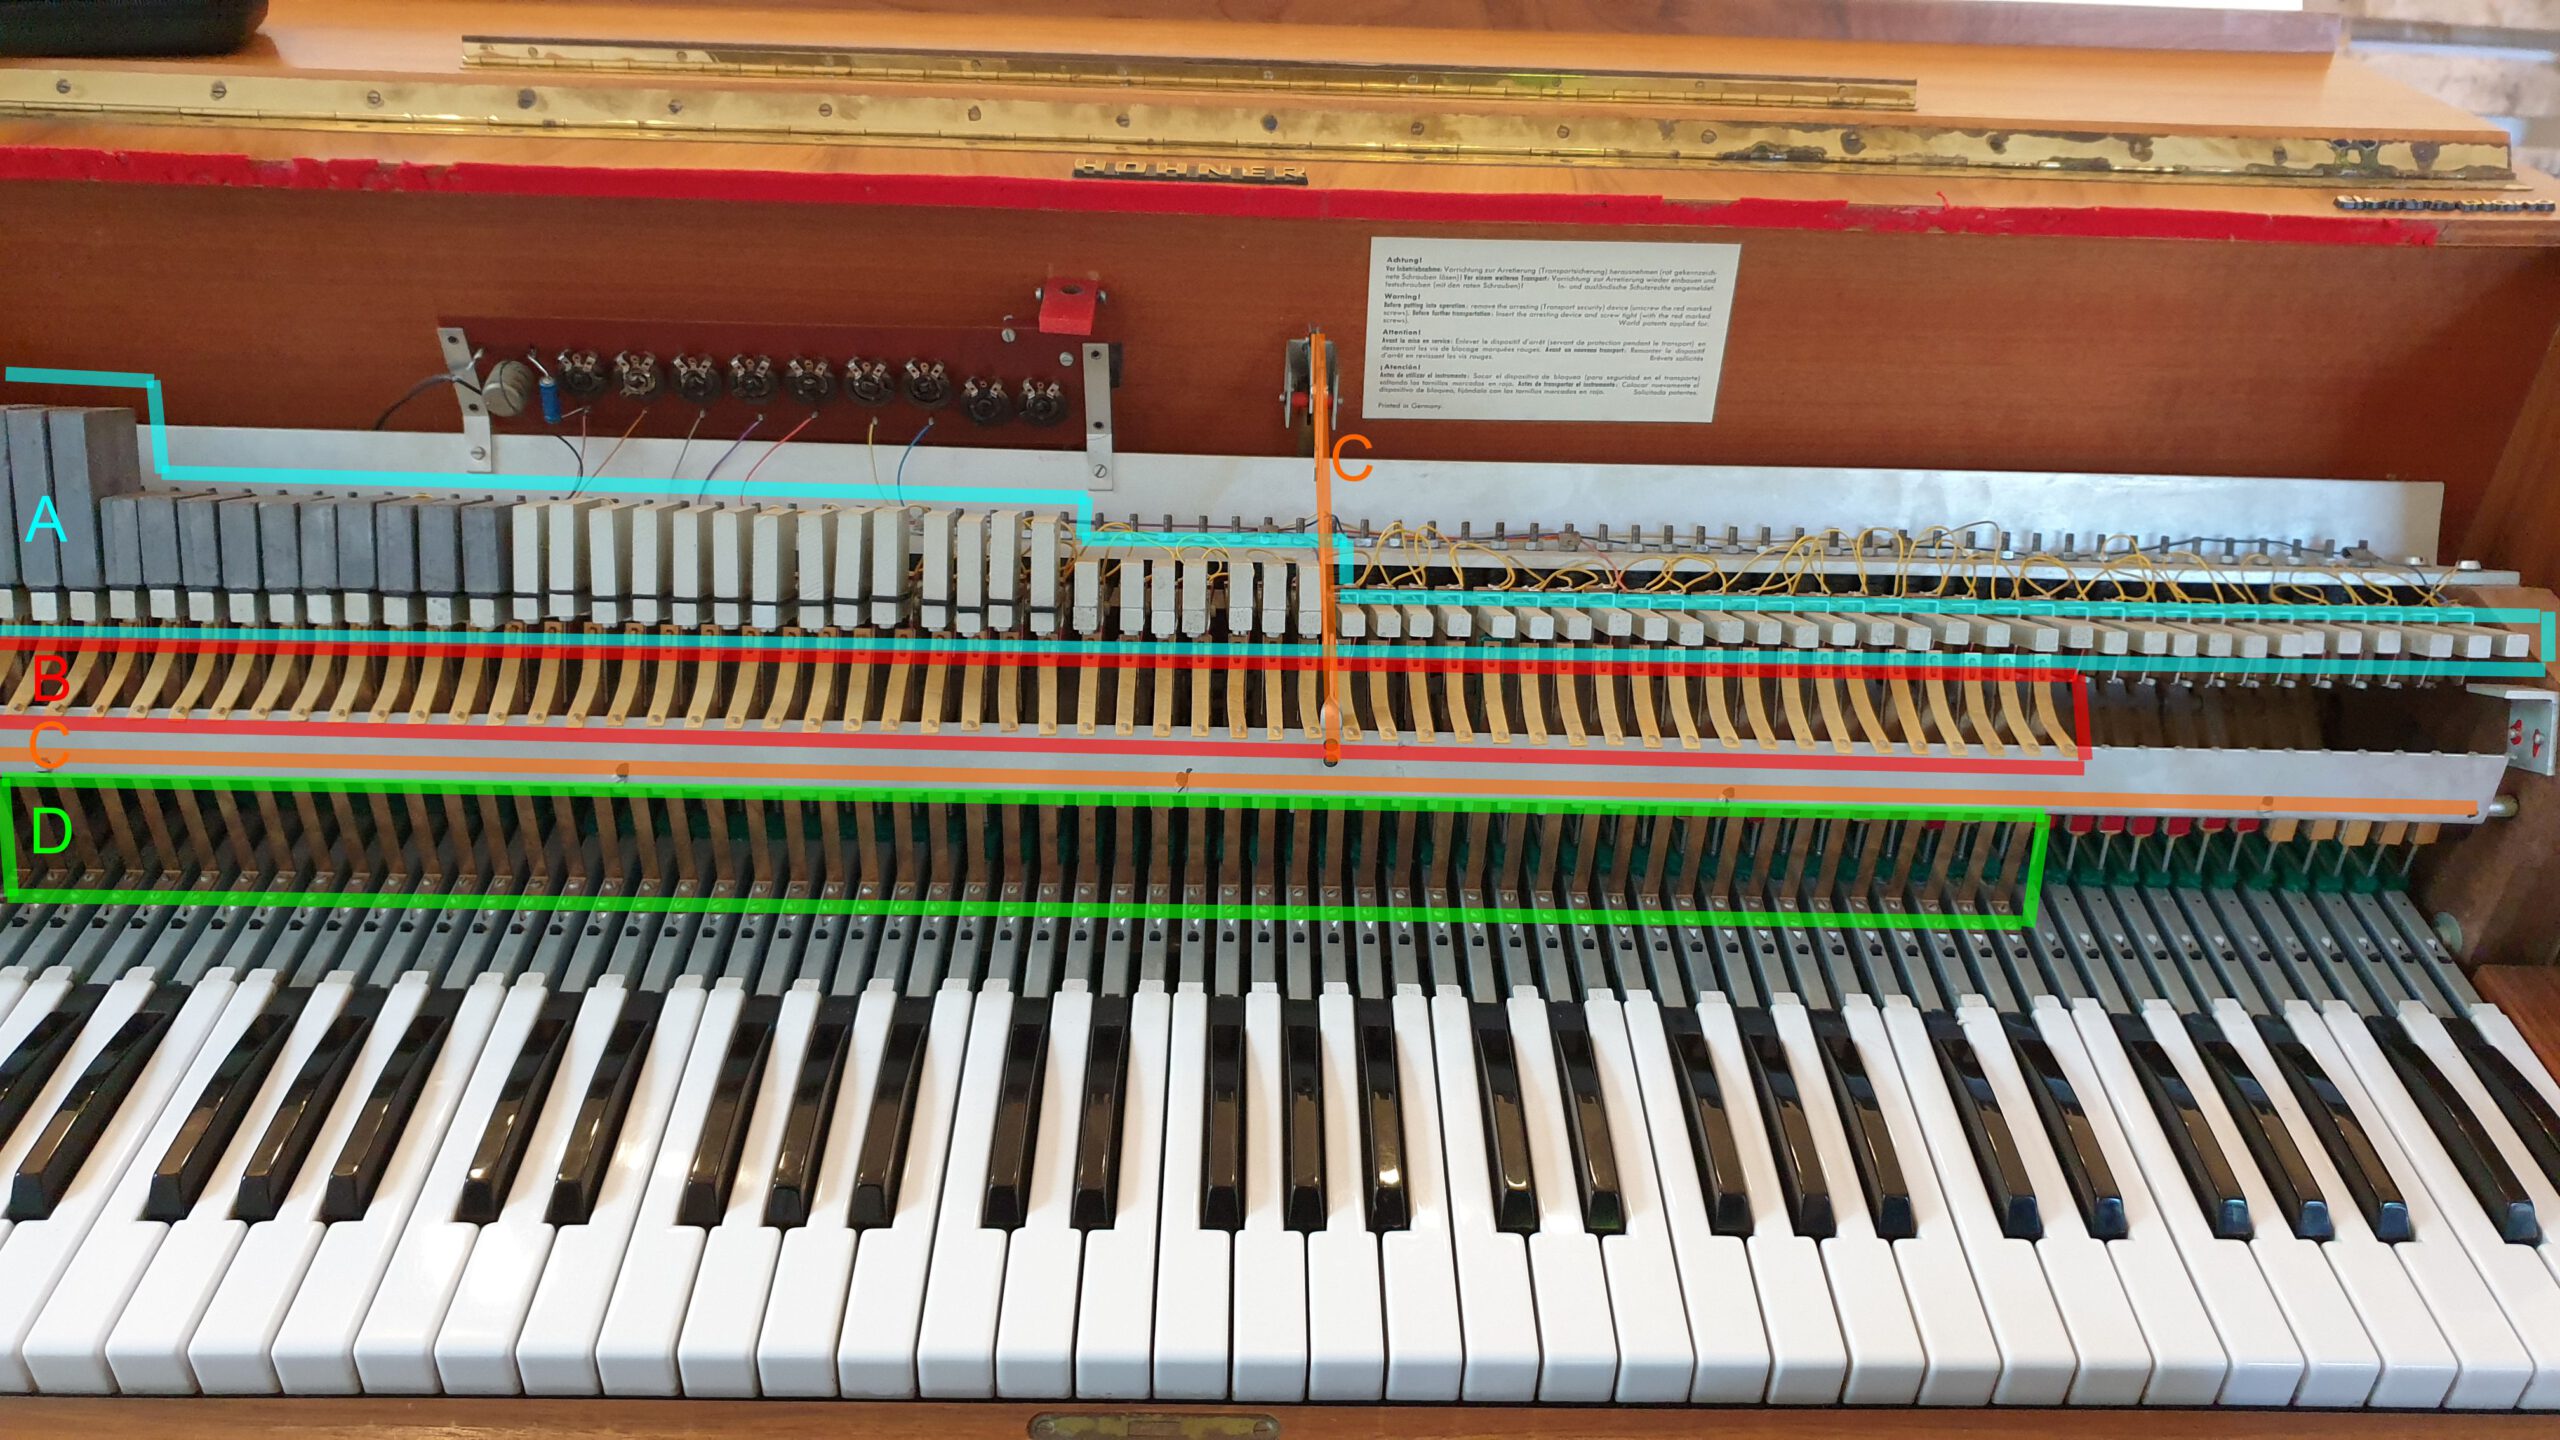
The info that I gather from the front view of the instrument (Pic 1) tells me the following: the action is quite simple. The moving parts are kept to a minimum. Pivoting parts are only the hammer butts (see pic 2). The dampers are connected through sheet metal to the keys. This type of action resembles early piano action found in the 18th century (more on that another day!). The simple action means that there is not a lot that can go wrong for the consumer, and not a lot to adjust for the technician. Only one screw is visible to make any adjustments. The other settings are accomplished by bending stuff: the hammers, the damper holders, and so on. You can see part of the screw in the upper part of the hammer butts (see pic 2 in blue). The screw adjusts the escapement. The escapement is the distance the hammer head (not really visible or marked in these pics) travels without being pushed by the keys to hit the sound exciter, which in this case is a metal tongue.
In a nutshell, and perhaps the main point of this post is to do exhaustive research before seeing the instrument, and to try to understand the whole instrument before diving into the obvious problems of the instrument may have (or the qualms your client has with it). The difference between an expert and a novice is no more than experience. Once you know the instrument, you don’t have to do the whole process again.
Oh yes, and before I forget, capacitors must be changed in an instrument as old as this. Any electronic that is older than 20 years is a ticking time bomb that can ruin the circuitry. The instrument might work, but there are parts that are not working as they should, because the capacitors are “leaky” and are not working like they are intended to.
Stay tuned for part 3, where I will go into detail on how the action works. Write a comment if you have any questions and I will reply from my Berlin workshop!
Great content, thanks a lot.
Any hope for a part 3? I am currently restoring my own Electra…
Hi Paul! I am hoping to write a part 3 soon. I already have a draft 🙂 Thank you for commenting!